![]()
Static grass as a product, will have the most impact you can have visually on your layout, diorama, model, or project. It can transform a section of board into an amazing landscape. There is a technique to it, but if you follow the steps I write below you will be fine.
There are three KEY points throughout this article that will make your grass look realistic.
The Baseboard
It does not matter what your model baseboard is made from. It can be wood, plastic, modelling form, fibre mould and so on. Even if you have the old scatter materials or grass matts. it will work.
The Glue
Your choice of modelling glue is one of the KEY products to the success of static grass. A word to the
wise, static grass does not like PVA Glue. Before you start to type an email to me with your fits, hear me out. PVA is a rubber base glue, which even when dry is moving. Over time this will harm the stability of the static grass, it can peel, shrink and curl up at the edges. All this can have devastating effects on static grass.
We use a plastic base acrylic glue, it can be applied directly out of the bottle and spread with a brush. It dries fast (which can catch you out, but do not panic if some parts dry you can cover it over in the next stage) and because it is plastic based it will not shrink or peel. This is called Basing glue, a thin layer of glue, for you first layer of grass.

Static Grass Basing Glue
- BASING GLUES – Basing Glue range of Adhesives by War World Scenics
- SIZES – Supplied in variety of bottle sizes
- EASY TO USE – Simply apply to the appropriate surfaces and allow to dry
- DRIES CLEAR – Ensuring minimal mess
- IDEAL – The perfect glue for applying the base layer of static grass any model railway or wargame layout and dioramas
£8.49 – £19.99
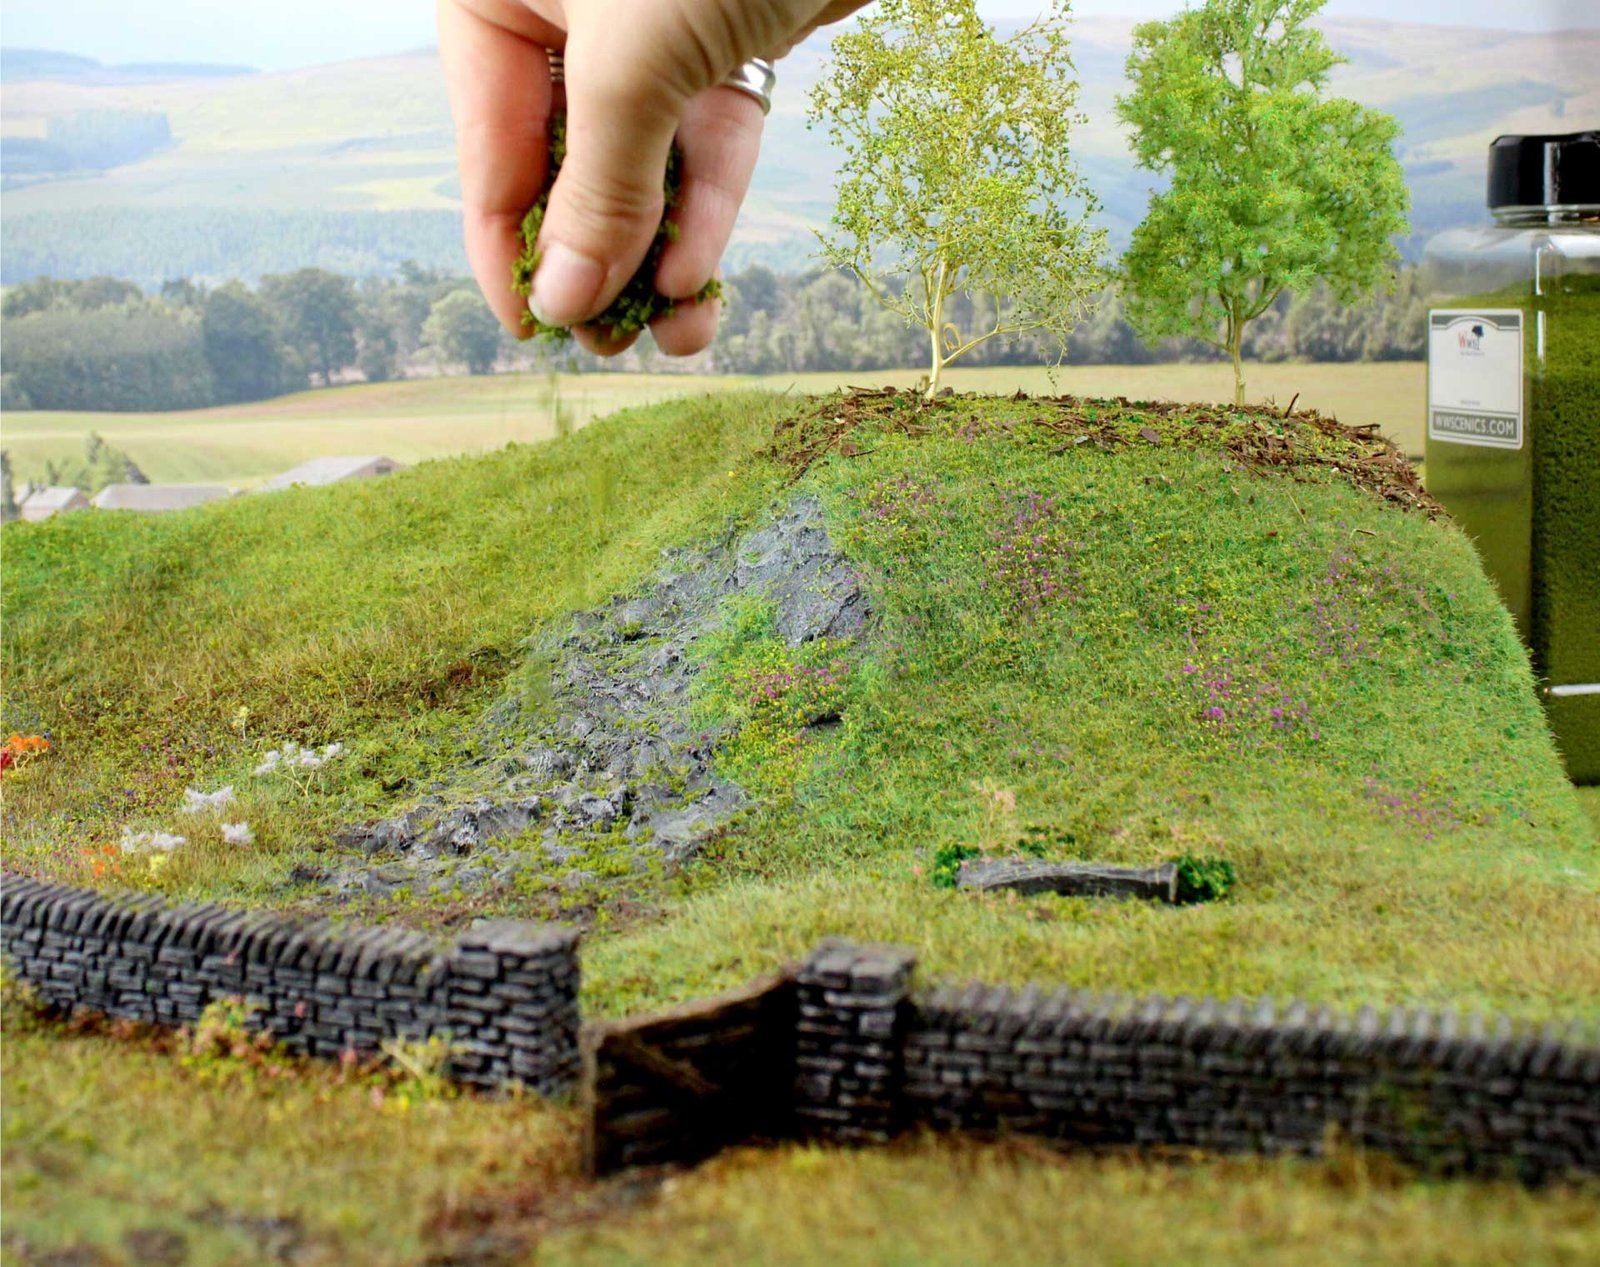
The Grassing begins
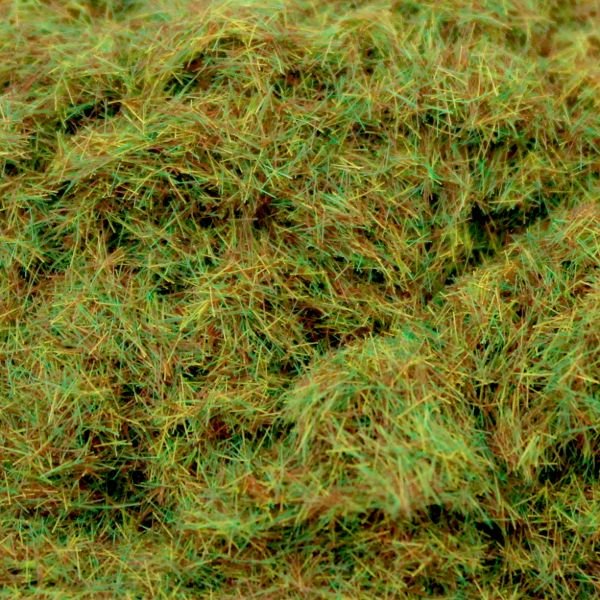
So, you have your basing glue down, now it is time to lay your first layer of grass. This is 2mm Basing Grass (we call it basing grass to help understand the entire process, but it can be used on its own) it is normally a green colour (I use 2mm Spring). However, this is up to you, it is your model so you can decide, but if you start with a green, it makes it easier to build the effect.
Static Grass
Our Static Grass system has revolutionised the world of model railway and diorama creation. We have developed a world-class, industry leading static grass application system that brings your dioramas and model railways to shimmering life. You can create realistic woodland areas, meadows, fields, marshes, and even scorched grass areas to add a touch of realism to your creations.
We offer a large, and ever-growing variety of static grasses that you can choose from to add to your model. From a narrange of seasonal static grass, to melting snow scatter and wild meadow grass, we have everything you could ever need to create realistic grassy landscapes.
Our static grasses come in a variety of colours, and are available in 1mm, 2mm, 4mm, 6mm, 10mm and 12mm lengths. Pair them with one of our Pro Static Grass Applicators and you are good to go.
Static Grass Applicator
Right, here we go. There are so many static grass applicators on the market and choosing which one
to buy can be a mine field. But, if there is one bit of advice I will give is to make sure you buy one with a hopper, one that the static grass is charged from behind. You unscrew the lid and load the hopper quarter full. If you over fill the hopper, it will not charge all the fibres and effect the performance of the grass.
The Fly swot tea strainer things are not static grass applicators, sorry harsh I know, but true. The thing with them is the grass sits on the charge, and like I have explained above, the grass needs room to move around to be charged. Plus, the plate/sieve is the negative end, so the grass wants to go the opposite way. With it laying on the sieve the power is in the wrong place and wants to go upwards. Hence the hopper style applicator is the correct tool for the job.
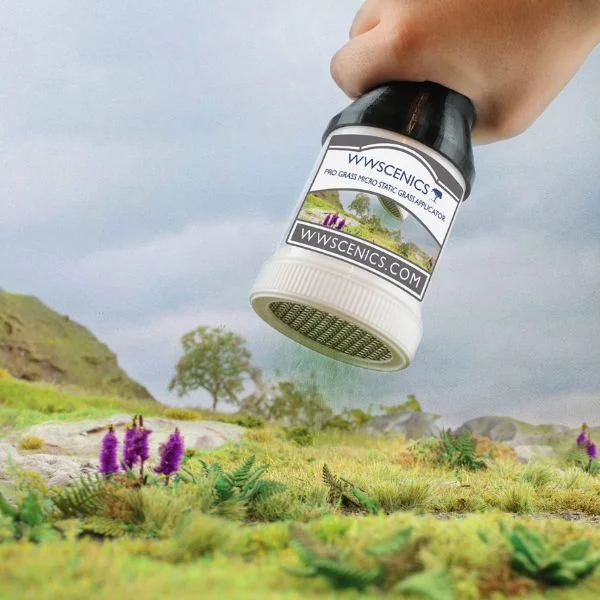
Pro Grass Applicators
Our Static Grass Applicators have become the industry standard when it comes to adding a touch of realism to your model railway, diorama scene, or even Scalextric; through the technique of flocking with Static Grass. As inventors of the Static Grass Layering System, we stock grass applicators that enable you to create any type of effect with your static grass. So, whether you are wanting to create Static Grass Tufts, realistic grassy landscapes, or even a scorched hillside effect, our applicators deliver an unmatched finish.
Our Pro Grass Applicators are available in a number of different sizes (Detailer, Grand, Micro, Box), depending on the level of detail you are trying to recreate. We also have a range of model scenery creation kits that gives you everything you need to create the perfect landscape.
Don’t forget to check out the WWScenics YouTube channel where our model scenery expert Martyn, shows you how to use our pro grass applicators for optimum results.
Back to it
The glue is down, and your hopper is quarter full, you are ready to go. Now this is where I blow your minds. DO NOT STICK A PIN, NAIL or SCREW into your model. There is no need, it is an urban myth, the hopper is the negative end, the crocodile clip is the positive end. Grass gets charged in the hopper, stands upright, and falls out of the hopper. It is attracted to the positive crocodile clip
and sticks into the glue upright. As long as the crocodile clip is close to the hopper, you will have great results, plus you will not have to repair the bit you pull the nail out of. If you do not believe me, try it.
I will say that when I first started using static grass, I used to put the pin in the model, and have videos and articles saying so. I must update these.
Time to switch the machine on and go for it! Keep the hopper around an inch away from the glued area, no more than that, otherwise the grass might lose the charge in the grass. Gently shake the hopper from side to side, and cover the glue, it is important that you do not over applicate, another KEY point. This will result in your grass not looking like it is standing up. Remember I said that
glue is the key.
Glue is the Key
You should have a nice layer of 2mm static grass on your model, that has
covered all the glue area. You do not have to wait for the basing glue to dry,
but if you were to brush glue over the top of the freshly laid grass, it will drag it
all up. So, you use static grass layering spray, a fine spray adhesive that you
spray directly onto the 2mm grass layer. This way you can start the project and
finish it, without waiting for any glues to dry.
I said glue is key and it is. Static grass will not work if there is no glue. This is
another common mistake most people do, just like when I said over applicating
the grass. If there is no glue, then the fibre will not stick, and will just fall flat.
So, make sure there is glue, but do not over spray, too much glue and it will
turn white.
Layering Spray
Shake the can so that it rattles, then add a thin layer on top of the 2mm grass
that you have already laid. Now add your 4mm green static grass, I use 4mm Autumn
grass, it gives a great contrast to the 2mm Spring.
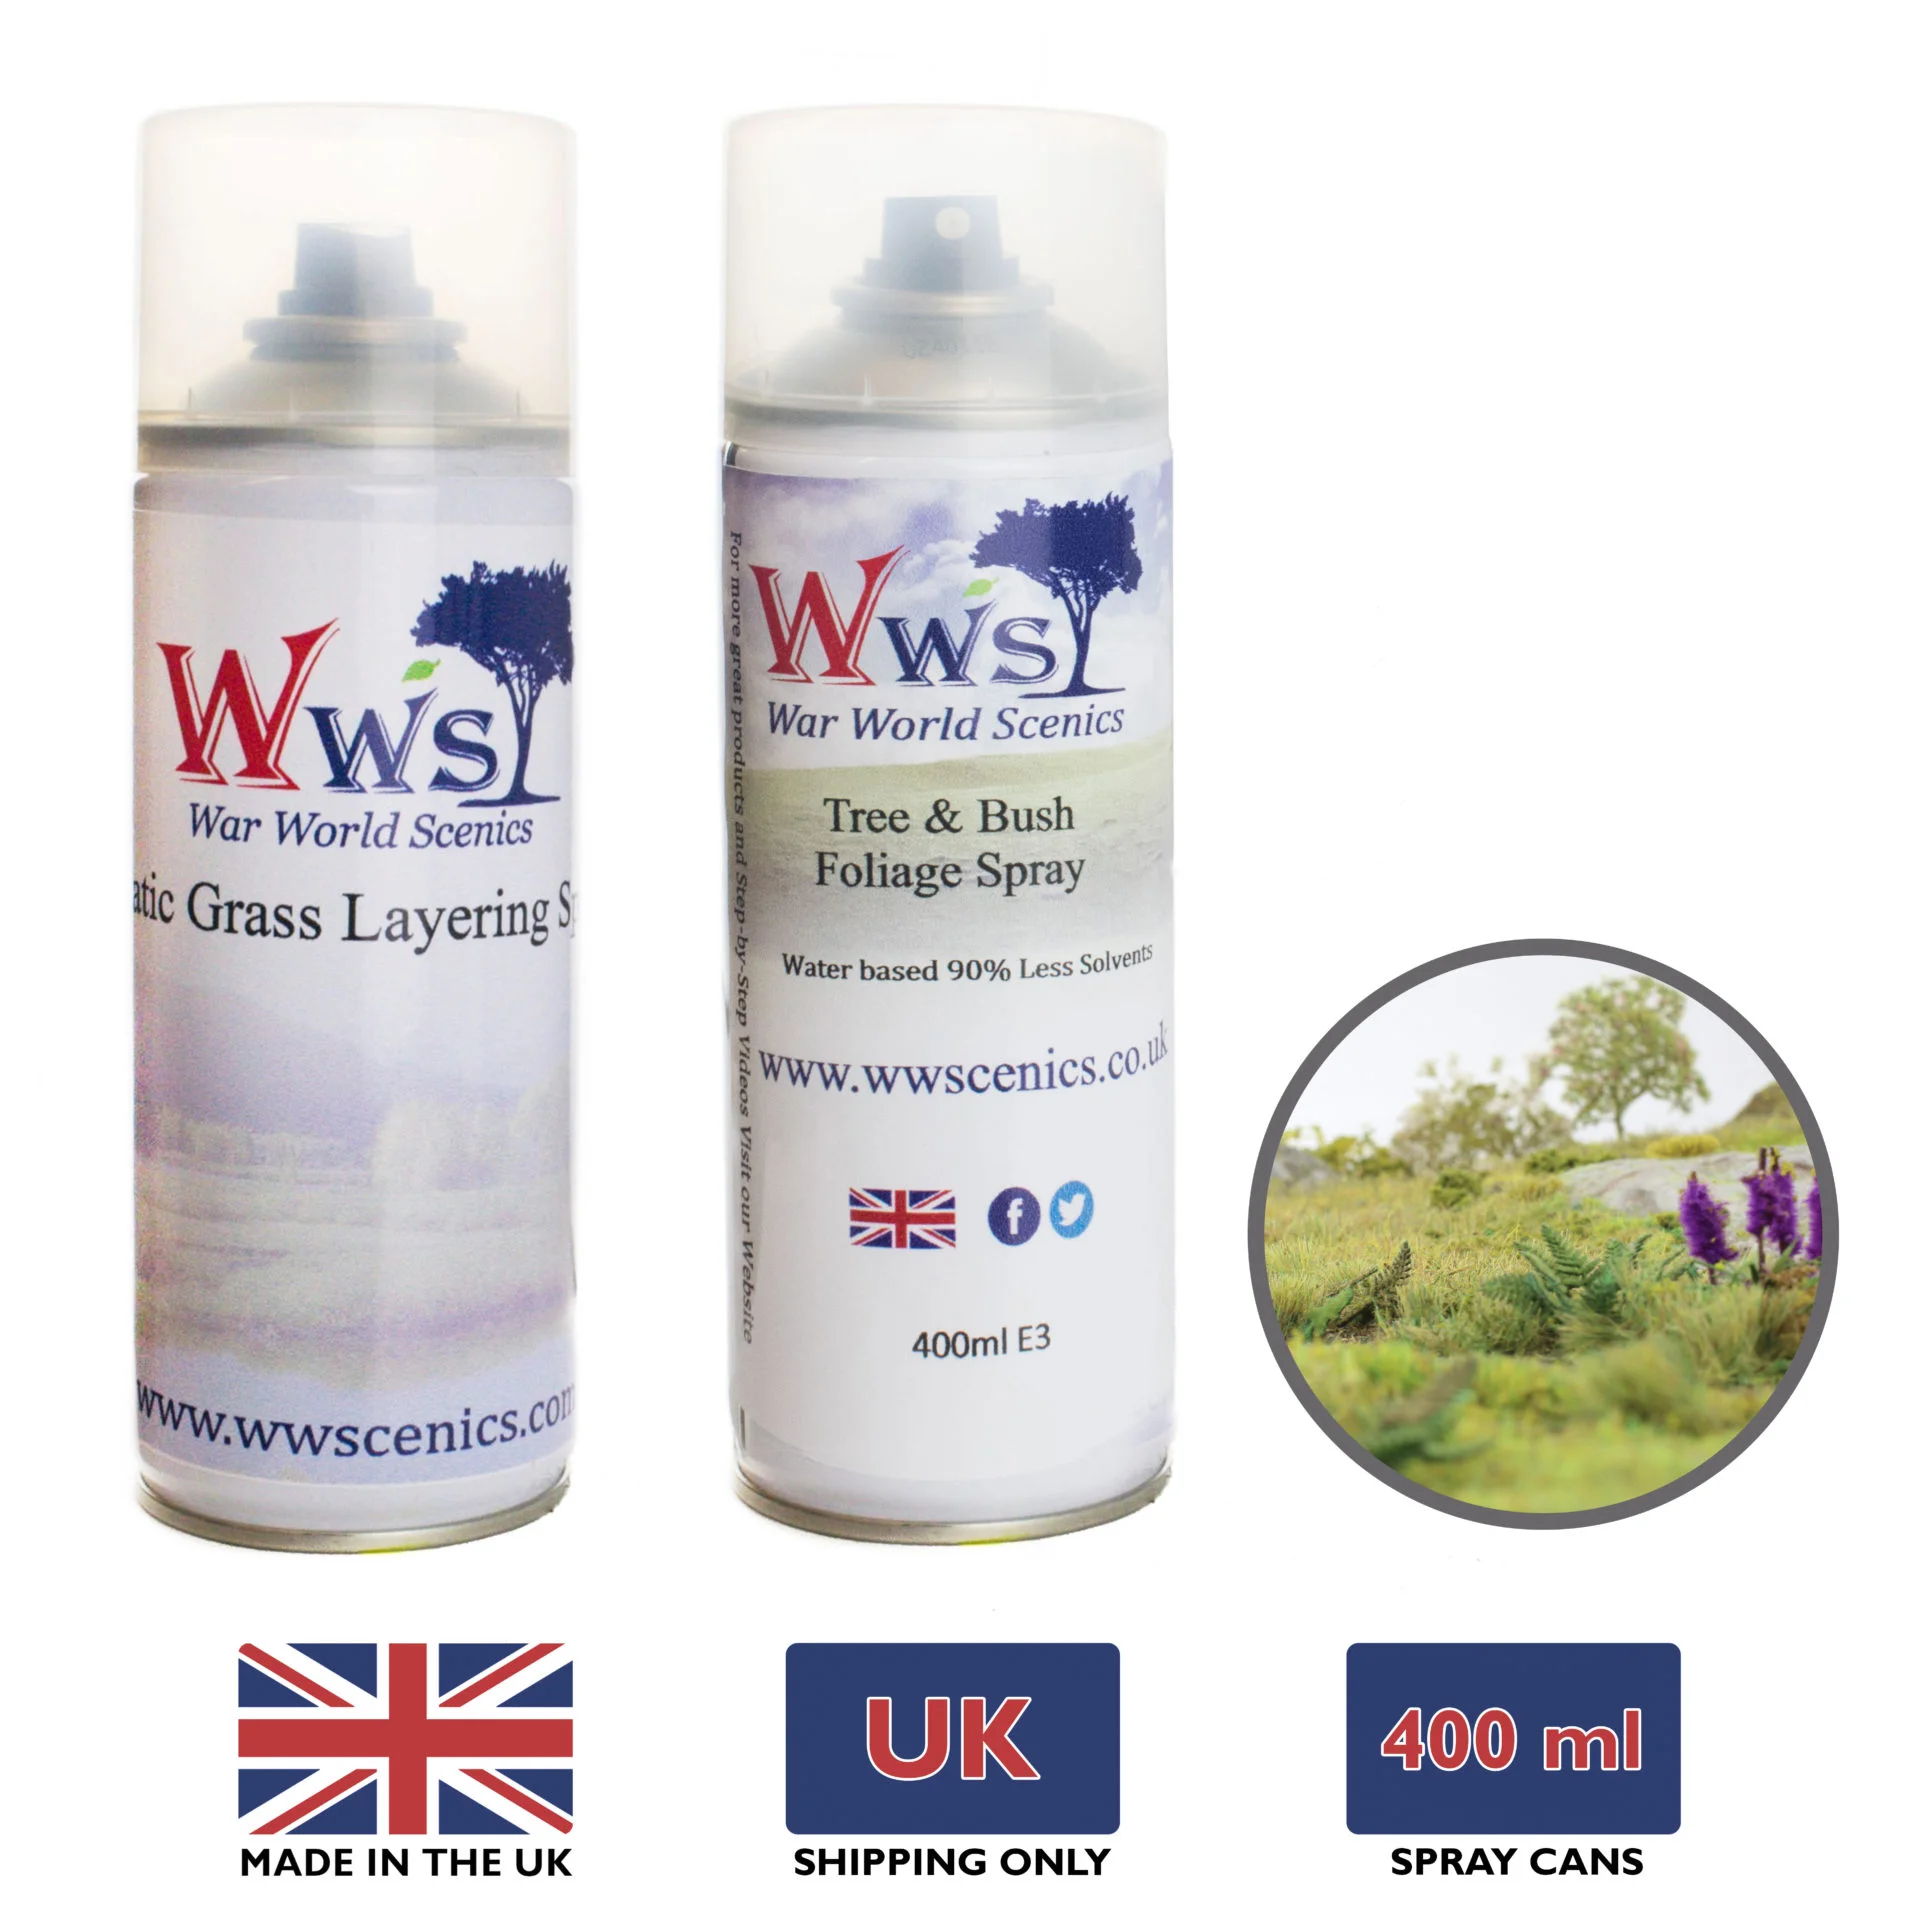
Layering Spray
Here comes the third Key point
As we know grass in nature is not green. I will call myself a bit of an expert on
this being a Welshman – lol! It is important to mix the colours of your grass, so
you get the realism. Brown colours will break up the green and create a more
natural look. I use 4mm Patchy and 4mm Dead static grass, do not go straight over
the top of each colour, spread them around and create patches.
Remember to spray layering spray each time you want a layer of grass.
4mm Layering Grass
Our Layering Grasses are made from realistic nylon flock fibres and come in a variety of lengths (4mm, 6mm, 10mm and 12mm) that you can apply using our pioneering static grass applicators.
Effortlessly add depth and variation to your model railway, battleboard or diorama landscapes, bringing them to life. Our 4mm layering grass is perfect for adding shorter clumps and layers of grass for creating realistic model scenery.
Mix our 4mm layering grass with longer grasses for more versatile grassy landscapes or use our 4mm layering grass on its own to create a more cohesive (but still natural and realistic) layer of grass. Choose from an array of realistic finishes, including Summer Meadow effect, Scorched Earth, Wild Grass Meadow, or Melted Snow Scatter. The only limitation is your imagination!
The last stage. Or is it?
Time for the 6mm, I normally use 6mm Wild Meadow Static Grass. This has a yellow brown
colour and brings out the under colours well. Same as before, apply static grass
layering spray, and applicate the 6mm on. Making sure you do not over apply.
Now you do not have to put this 6mm on, you might be happy with the results
you have, it is entirely up to you.
That is it – you are done and can leave it like that. In 4 hours or so it will be dry.
However, there is another process you can do at this stage. If you want to
create a rough embankment, or unkept sidings or even a march land, follow
these steps.
6mm Layering Grass
Our Layering Grasses are made from realistic nylon flock fibres and come in a variety of lengths (4mm, 6mm, 10mm and 12mm) that you can apply using our pioneering static grass applicators.
Effortlessly add depth and variation to your model railway, battleboard or diorama landscapes, bringing them to life. Our 4mm layering grass is perfect for adding shorter clumps and layers of grass for creating realistic model scenery.
Mix our 6mm layering grass with longer grasses for more versatile grassy landscapes or use our 6mm layering grass on its own to create a more cohesive (but still natural and realistic) layer of grass. Choose from an array of realistic finishes, including Summer Meadow effect, Scorched Earth, Wild Grass Meadow, or Melted Snow Scatter. The only limitation is your imagination!
Time to get creative
It is really easy to do, use a small stick or pen and create divots in the grass you
just laid. Then spray with layering spray glue, you might have exposed the
baseboard, use the starting 2mm basing grass to cover over the area you just
did. This will hide the board and give it a thicker texture. Spray the area again
with the layering spray and apply either a Patchy 4mm or a Dead 4mm.
Covering the bumps – this will create natural looking tufts.
The finishing touches
You can now add some sponge foliage scatter to create thick vegetation or
low-lying bushes. I use Course Olive Green Foliage Scatter and Course Burnt
Grass Foliage Scatter. You can then add some fine flower flock for added detail.
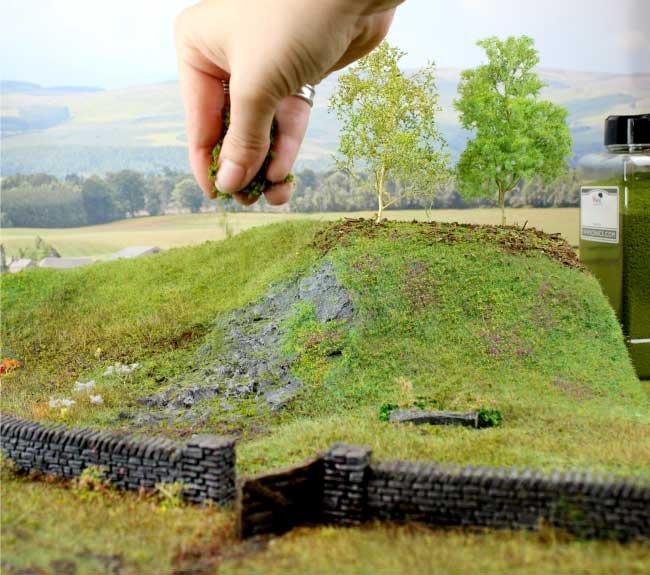
Foliage and Scatters
Our foliage and scatters are the perfect finishing touch to any model railway layout or diorama scene. Whether you need to add detail to shrubbery on the side of your track, or realistic algae on a cliff or marshland, our foliage and scatters are the perfect addition to your modelling toolbox. They offer a realistic finish and are easy to use; you’ll wonder why you haven’t been using them all along. For best results, use our foliage and scatters together with WWScenics Static Grass and Model Glues. We recommended our Layering Spray for ultimate versatility.
The End
Hopefully you are happy with the results that you have created, and that you
are confident to go forward and make many more dioramas, layouts, and
models.
I hope you have enjoyed reading the article, this should give you the
confidence to produce some great results with static grass. The most
important rule to remember is, have fun, be as rough and messy as you like. As
I always say, if you make a mistake, it turns into a good idea. Remember you
are creating nature. There is no Rule.
Written by Martyn Rees
